Have you ever plucked a chicken? This is not a question that one encounters often. It is now one that I can answer with an emphatic "YES"! In our every evolving quest to provide our family with healthy, all natural meats we embarked on a mission for good ol' home grown chicken. Loving known around southside Virginia as "yard-bird".
Our mission began with the purchase of 20 cornish X rocks from our local Tractor Supply store. This is a hybrid breed of chicken which comes from crossing a cornish rooster with a white rock hen. The large poultry suppliers spend years and lots of money fine tuning their crosses and enhancing specific traits, such as rapid growth and large breast. The 20 chicks we purchased grew to a slaughter size of 10 pounds in 10 weeks! If I hadn't raised these birds myself, I never would have believed they weren't chocked full of growth hormones and steroids. We made sure our birds were fed an all natural diet of high protein chicken feed. They were kept on pasture in movable chicken sleds I built myself, but that's another story.
![]()
Finally the day came to slaughter our chickens. I certainly wasn't looking forward to it, but it had to be done. These chickens grow so fast and get so large that their organs and legs can not support their own weight if they are allowed to grow beyond a certain point. My husband nor I either one had every processed (term for killing, plucking and gutting) a chicken before. Several You Tube tutorials later we were as ready as we'd every be and went to it.
***MOMMY NOTE: We all know the importance of teaching our kids where their food comes from. Chicken processing is messy and could frighten some children. Watch some online videos first, then decide if getting your kids involved is right for your family.***
Our first meat chicken adventure taught us several things. First, hand plucking a chicken is not easy, no matter how perfect your scalding water is, nor how correctly you follow directions. Second, to meet my personal standards, it will involve hours with tweezers. And third, the purchase of an automatic chicken plucker (the Featherman Pro) was the best money we ever spent!! The first batch of meat chickens was trying, but a success. There was no question after the first one I roasted that it was worth all the effort.
In years past, my grandmother killed and fried a chicken every Sunday morning. My dad tells of one Sunday, when he was about ten years old, that she sent him out to "fetch her a bird". Not wanting the chicken to see what was about to happen, he held an oak leaf over the chickens eyes while he chopped its head off. That was just how it was done 60 years ago. Today, when a kid helps grandma get a chicken, it involves a shopping cart and the freezer section of their local Food Lion. There is no concept of where that bird came from, how it was raised or the sacrifice it made. Quite honestly, I never put much thought into it either, until I had to hold that metaphorical leaf myself.
"Hey mom...what's for dinner?"
"Roasted yard-bird"
- 1 (6-8 lb) whole chicken, thawed in the fridge
- 1 orange
- 1 lemon
- 1 onion
- 1 apple
- 1 stalk celery
- vegetable oil
- 2 Tbsp fresh basil, chopped
- 2 Tbsp fresh sage, chopped
- 1 Tbsp fresh rosemary, chopped
- salt, pepper and red pepper flakes
Pre heat oven to 425. Line a roasting pan with foil for easy clean up. Wash and pat dry chicken with paper towels. In a bowl, mix zest of orange and lemon, juice from orange and lemon, basil, sage, rosemary, 1/3 cup oil and 1 tsp each of salt, pepper and red pepper flakes. Quarter remains of orange and lemon, stuff into cavity of chicken along with quartered onion, celery and apple. Chop into smaller pieces if it all doesn't fit. With breast side up, GENTLY, pull skin away from meat starting just above large cavity opening and work your way towards neck opening. Use a spoon to stuff spice/oil mixture in between skin and meat. Drizzle additional vegetable oil (doesn't burn as quickly as olive oil) over skin of bird and liberally sprinkle with additional salt and pepper. Rub all over to coat entire exterior of chicken.
Place breast side down and brown for 15 minutes, the oil will smoke some. After 15 minutes remove from oven and flip chicken so breast side is up. Insert a meat thermometer into thickest part of breast without hitting a bone. The ONLY way to properly roast a chicken requires using a meat thermometer. Brown for an additional 15 minutes, then loosely cover chicken with aluminum foil and DECREASE temperature to 325. Roast until meat thermometer reads 165. Allow chicken to rest for 10 minutes before carving. Enjoy:)
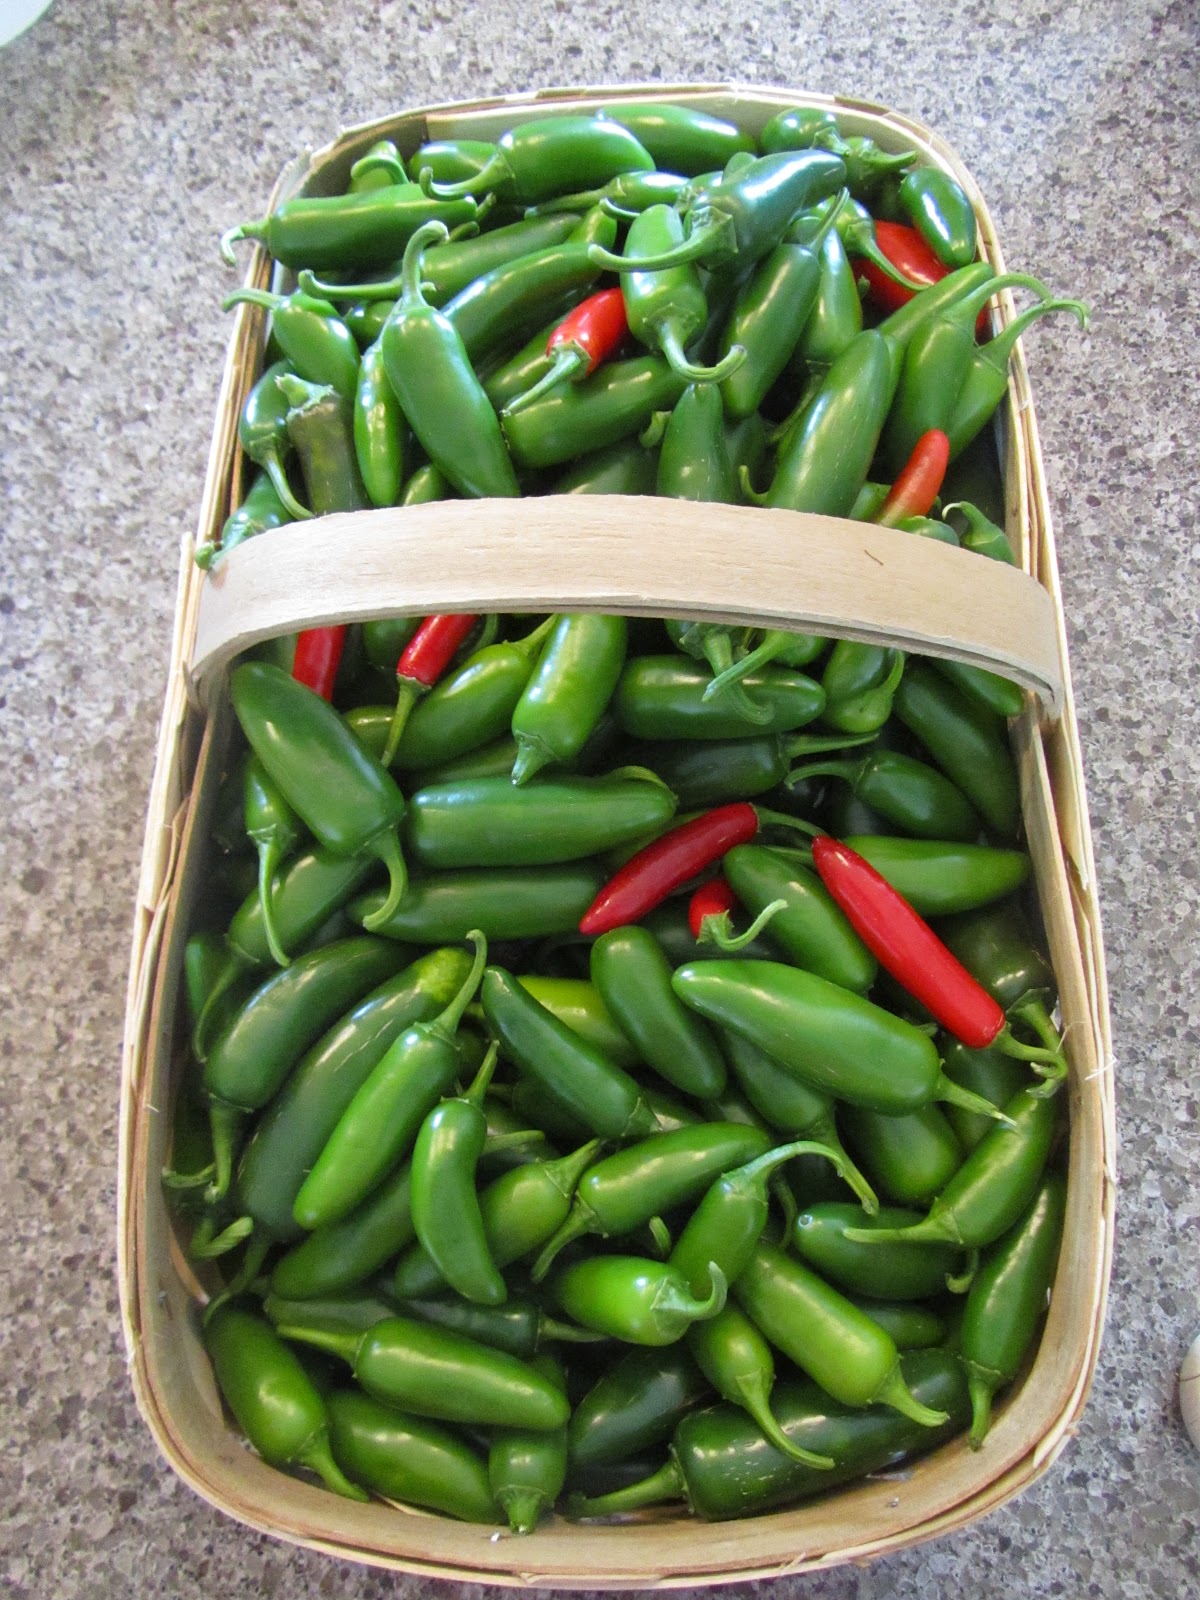
HOT! HOT! HOT! Who doesn't like it HOT?!? Well, if you're talking about the temperature, not me, but when it comes to cooking...ohhhhh yeahhhhh! And there is no better way to spice it up then the those little green bites of goodness...the jalapeno. When the rest of my garden resembles a barren waste land, the pepper corner is rocking. Jalapenos seem to L-O-V-E the hot, humid summers and acidic, red clay soil of southern Virginia. A $1.50 pack of four jalapenos plants have produced enough peppers to last my family an entire year and my kitchen never skimps on the spicy! The picture above is from the first picking off my four plants.
So, now that I have all these peppers, what is the best way to preserve them? Frozen or canned? Sliced or whole? My answer...all four! I never know when the need to burn will hit me, so I want to be prepared with a vast array of preserved peppers. Canned pickled pepper slices stay nice and crisp and add a kick to sandwich's and burgers. Chop a whole canned pepper to add to any cooked dish, like chili. Use frozen julienned peppers to take your stir fry to the next level. Not all jalapenos are created equal, so before your double dose that pot of chili, take a test bite. I have found jalapenos vary greatly in heat, unless they all came from the same plant.
***MOMMY NOTE: When picking or doing anything with hot peppers, keep the kids at a distance. Make sure to thoroughly wash your hands and all equipment before touching your kids or letting them handle any of the buckets, bowls or utensils you used. When slicing peppers, the seeds will fly! The oil that burns our skin is found primarily in the seeds and insides of the peppers. ***
For a tried and true source for canning instructions I rely on www.pickyourown.org. They have simple step by step instructions with lots of pictures that even a first timer can follow. When it comes to canning and preserving instructions, always get your information form a reliable source. Improper canning can not only waste your time and money, it could make you and your family ill.
Canning can be very intimidating, the simplest way to preserve is freezing. But, if your gonna freeze veggies put the money into a vacuum sealer. It really will pay for itself! Time and again I have tossed freezer burnt items. I have yet to have a vacuum sealed bag let me down. Currently I am using a FoodSaver vacuum sealer. The refill rolls are pricey but well worth it in the long run and can be found online and at Walmart. If you're gonna put the time, effort and money into a garden, you owe it to yourself to do same when preserving your gardens bounties.
"Hey Mom...what's for dinner?"
Grilled Roast Beef and Jalapeno Samich
So, your family doesn't eat leftovers, here's what to do with last nights pot roast and some of those jalapenos...
- roast beef, trimmed of all fat and gristle, shredded or sliced thin
- french bread, cut into 1" thick slices
- 2-3 jalapenos, seeded and sliced into rings (discard stem)
- sliced provolone or muenster cheese
- butter, mayo, olive oil and A1 sauce
Heat 1 Tbsp oil over medium heat in skillet. Cook jalapeno slices until slightly soft, about 3 minutes. Remove pepper slices from skillet and set aside. Return pan to heat. Spread butter on one side of each slice of bread. Place buttered side down in pan, top with roast beef, peppers (as many as you dare) and cheese. Top with second slice of bread, butter side up. Grill for about a minute or until golden brown. Hold top slice with one hand and help guide it over as you flip with spatula to grill other side. Smash it down with the spatula to get all that goodness in the middle stuck together. Whisk together 2 Tbsp mayo with 1 Tbsp A1 sauce for dipping sauce. Enjoy :)